Short-term property management companies are painfully aware that the job comes with no shortage of tasks. From stocking up on supplies and cleaning units between stays to communicating with guests through every step of the reservation cycle, successful property management means ensuring no task slips through the cracks. That’s where Guesty’s Task Management features come in.
Watch the video below or continue reading to learn how to set up auto-tasks and put this all important operation on autopilot.
Video: Setting Up Auto Tasks – Guesty Help Center
What is an auto-task?
An auto-task is an assignment that is triggered by an event, such as a check-in or the confirmation of a reservation.
How can you set up an auto-task?
Step 1: Select the relevant listing
Click ‘Listings’ from the top menu of your Guesty dashboard and select the relevant listing. Once inside the listing, click ‘Tasks’ and then ‘Add a Template.’
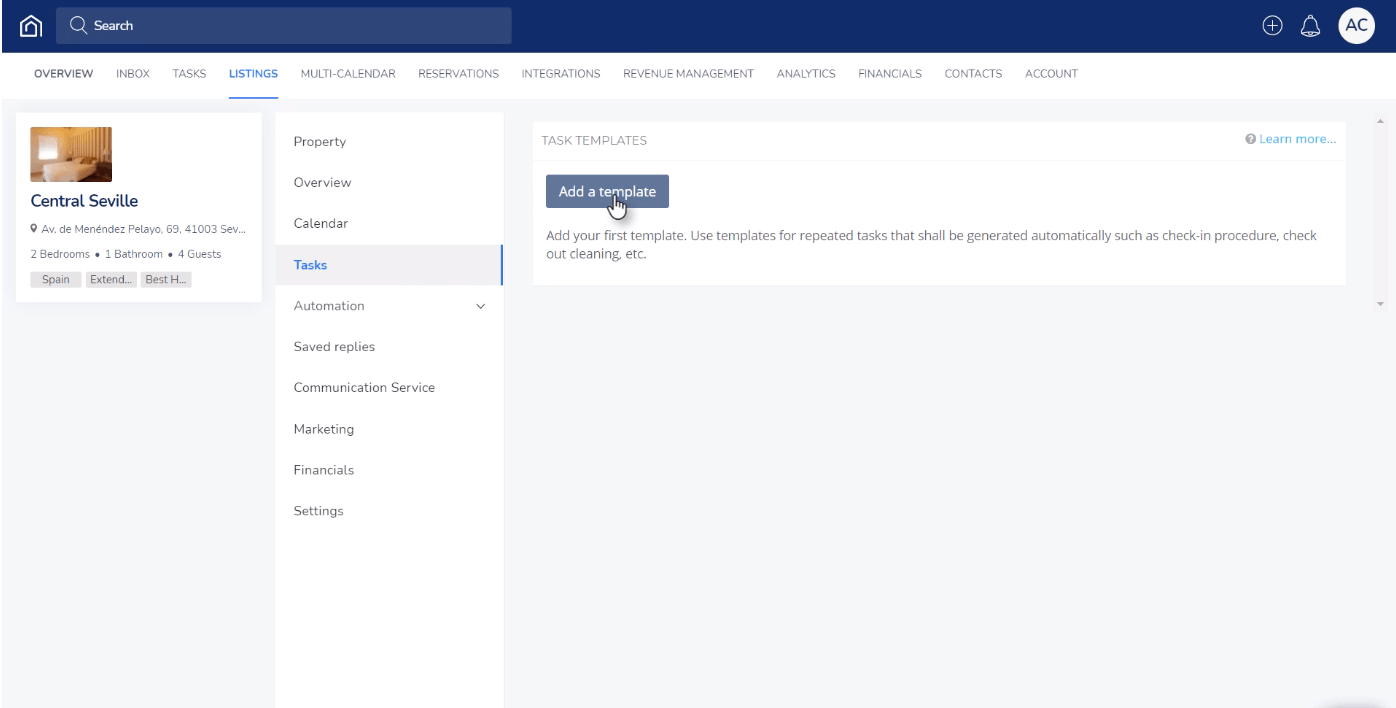
Step 2: Define the task
Give the template a title and description, define the duration of the task and if relevant, set a priority level. Then create a checklist of things that must be done in order for the task to be completed. You can also choose to upload an attachment to provide your staff with visual instructions.
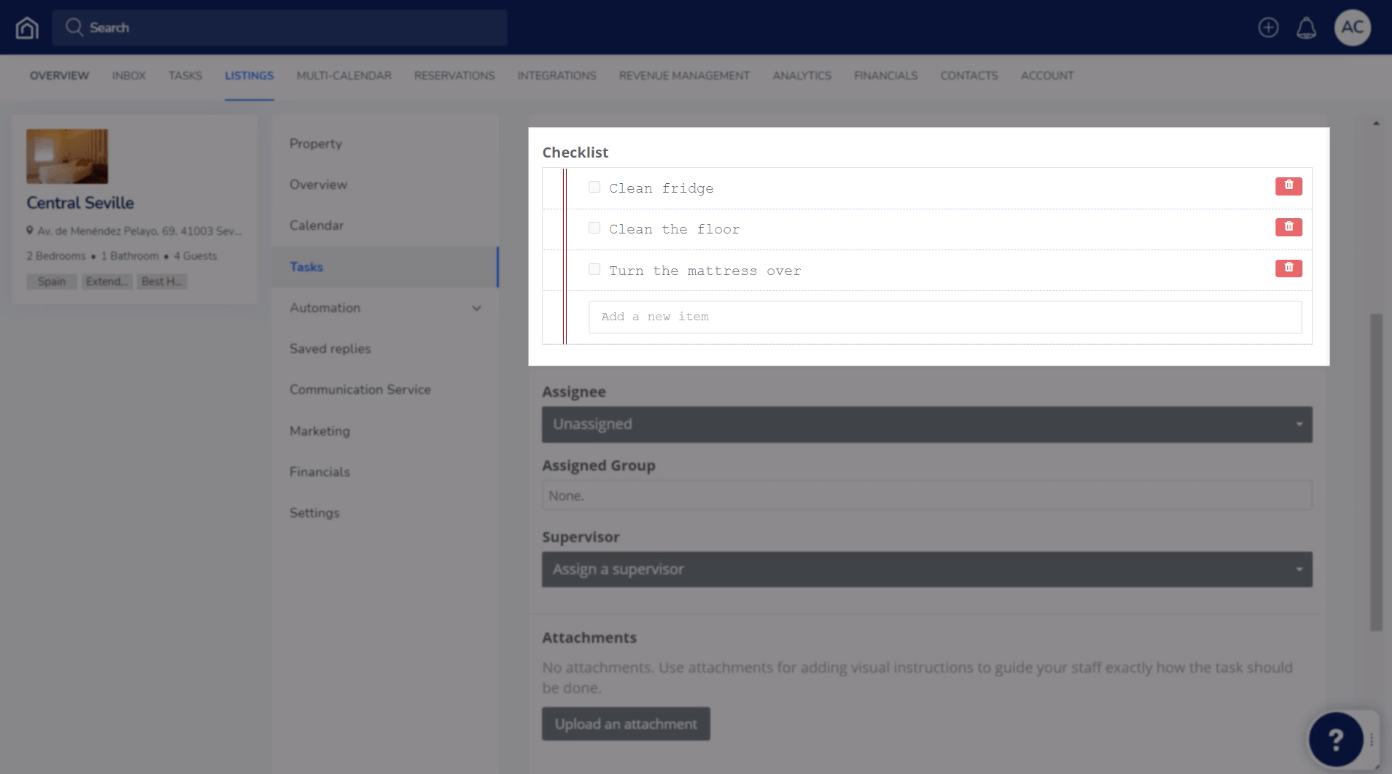
Step 3: Assign the task
Within the task template, you can assign the task to either an individual within your team or a group, as well as a supervisor, if relevant. Assignee fields can be left blank if you’d prefer to manually assign tasks once they are automatically generated.
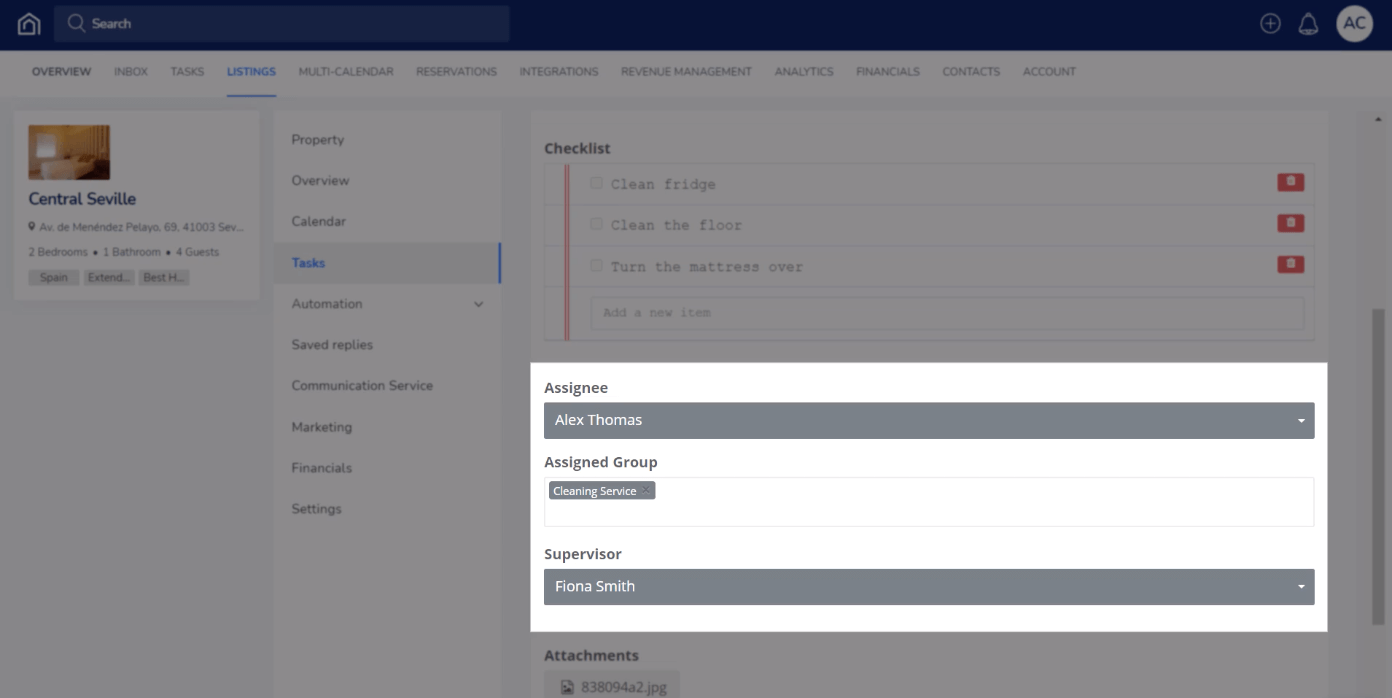
Step 4: Set up post-task automation
At the very bottom of the template, you’ll find a field titled ‘Automation upon task completion,’ where you can set up actions to be automatically taken once the task is completed. Such actions include marking the task as completed or sending a message to a guest or team member. Then click ‘Save’ and you’ll find your new task listed under ‘Task Templates.’
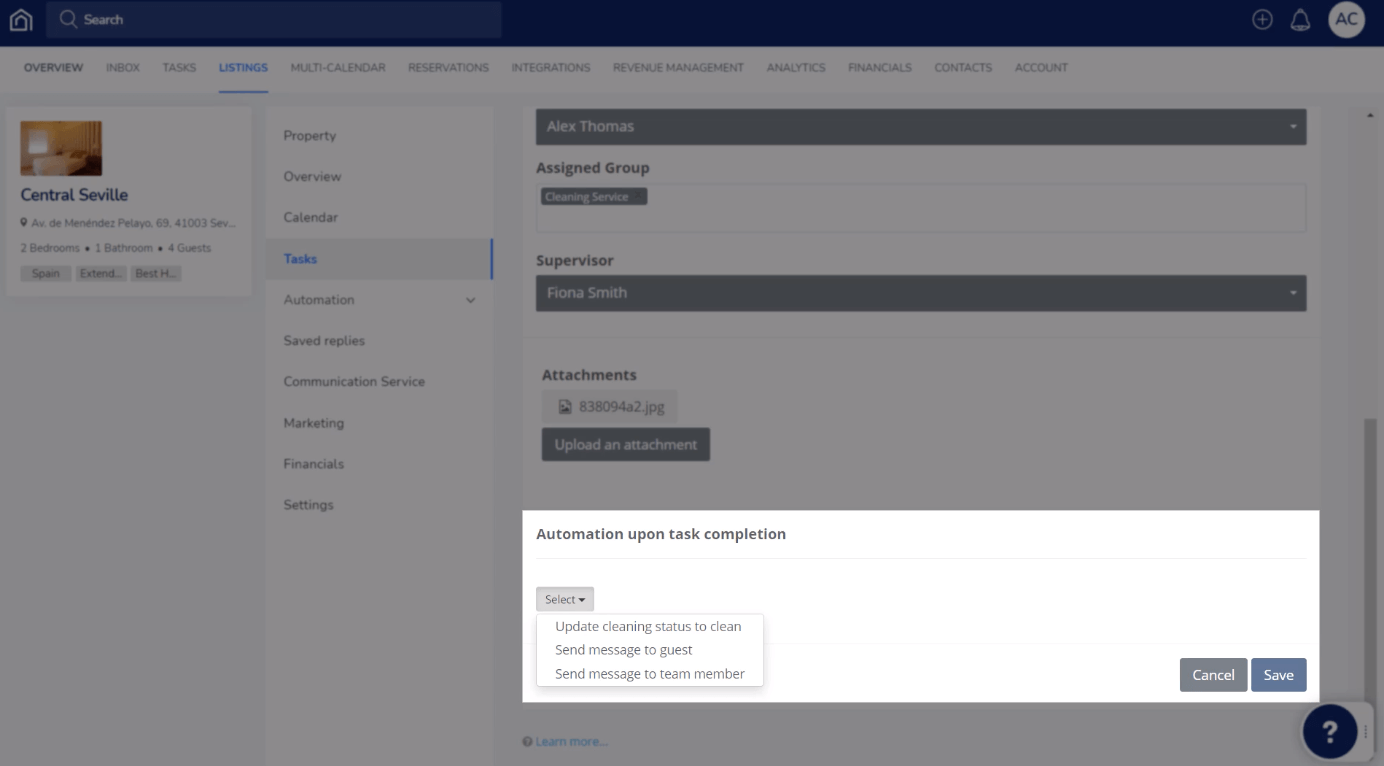
Step 5: Automate the task
Under the listing’s main menu, select ‘Automation’ and then ‘Auto Tasks.’ Click ‘Add auto task’ and then select the task template you just created. Then choose when the task should be scheduled for, like a number of hours before or after a specific event. You can then opt to provide a clear time frame as to when the task may be started and when it must be completed. Click ‘Save’ and the task will appear in your list of Auto Tasks.
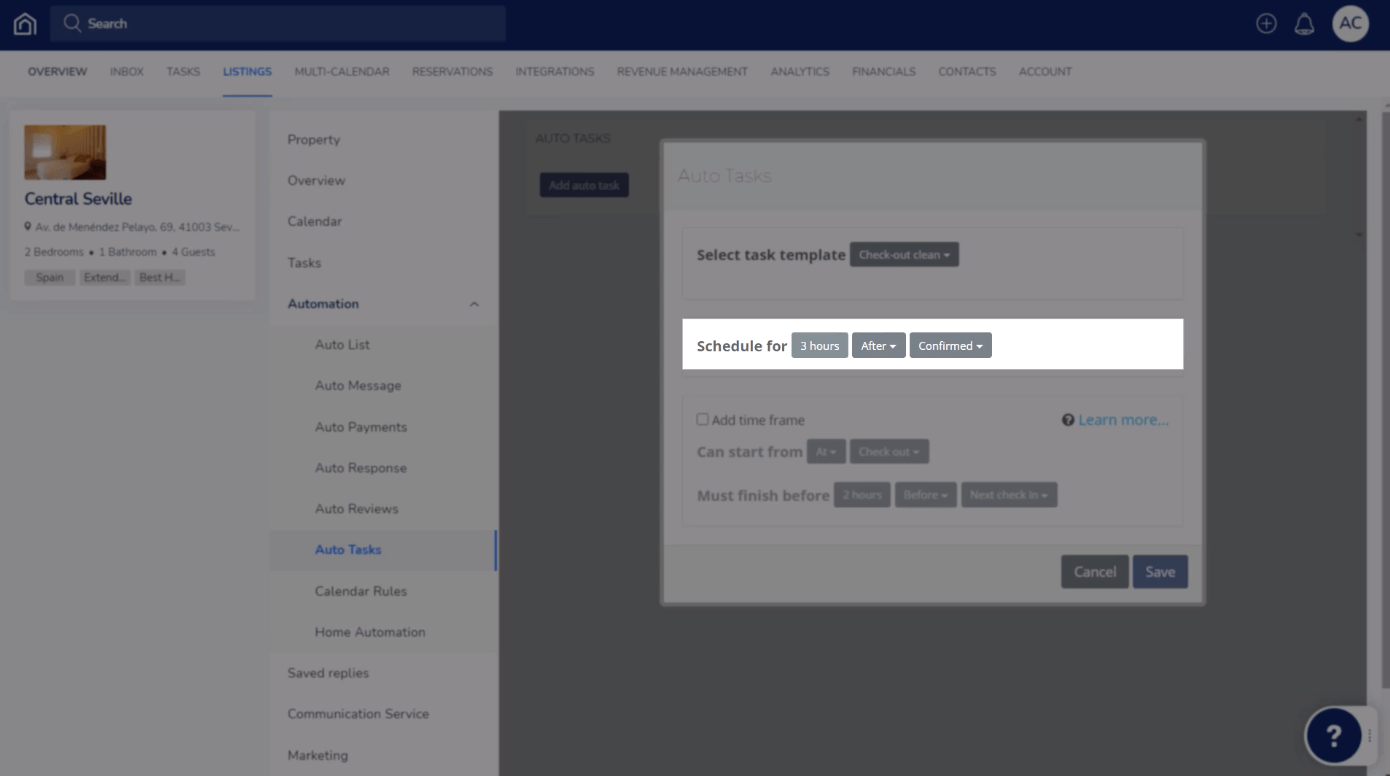
You can add more templates and set up additional Auto Tasks at any time. Once set up, tasks will be created automatically for all new confirmed reservations at the listing to which they’ve been assigned. If a reservation is cancelled, all corresponding Auto Tasks will be cancelled as well.
When it comes to multi-units, you can create distinct templates for each subunit so that different tasks can be performed for different rooms. Create Auto Tasks for subunits the same way you’d create them for individual listings.
Want to learn more about facilitating simple task management with Guesty? Check out our Help Center, where you can find step-by-step guides to creating and using both automatic and manual tasks.


